Installation guides and accessories
Installing small dehumidifiers type PD2, PD3, PD4, PD5
Make a clearance or screw hole for an M12 (P0.5) mm fine pitch screw in the container on which you will install the dehumidifying element. Position packing and slowly screw the dehumidifying element into place. Note the packing is not supplied.
(Specified torque 0.25 to 0.39 N. m)

Optional locking rings for M12 dehumidifiers type PD2, PD3
M12 Plastic locking rings for model PD dehumidifiers when used with clearance holes. Outside diameter 16mm, depth 2.5mm.

Installing small dehumidifiers type RD3 & RD4
Make a square hole 12.5 mm x 12.5 mm in the container, insert the packing (included) and attach the dehumidifying element with four M2 screws. RD3 is mounted on the outside of the container, and RD4 on the inside. (Specified torque 0.18 N. m).

Installing small dehumidifiers type RS1 and RS2
Make a square hole 17.5mm x 17.5mm on the enclosure insert the gasket and attach the micro dehumidifier with two M2 screws and washers.
*Specified torque : Max 0.088N・m (0.9kgf・cm)

MDL mounting kits
The new range of optional Rosahl mounting kits for the MDL series of membranes is designed to simplify membrane installation. Fabricated from pre-drilled stainless steel, three models are available. They are MDL-3KIT, MDL-5KIT, and the MDL-7KIT. Each kit includes a retaining plate and two packers/gaskets. The packers are manufactured from ethylene propylene gaskets and are also available separately.
MDL external cover plate (CVP)
The MDL-Kits also include a plastic grille that installs on the outside of the enclosure to provide ventilation and ventilation for the extracted water vapour. They are the same size as the retaining plate and use the same fixing centres. The design also allows for seamless integration with other protective measures such as the rain cover as seen below.
For harsh environments that can be fitted with a vapour transmission sheet (VTS) to protect themembrane from water droplet, dust and oil mist.
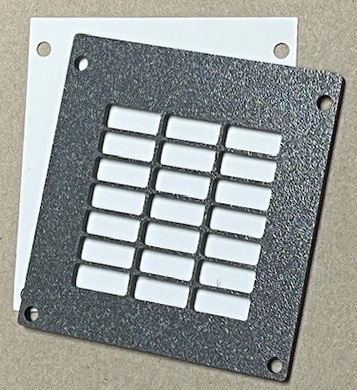
Image of M5J-VTS grille and VTS sheet
M Series installation


MDL Installation
As shown in the figure, fit the packing to both sides of the dehumidifying element, attach the retainer plate on the top and fasten at around four points around the edge with M4 screws. Care should be taken to ensure the membrane terminals are adequately distanced or insulated from the panel surface.
M-Series installation
Optional parts
Rain cover for direct installation
Where the membranes are installed outdoors, protection against the elements is necessary to prevent rain drops and insects from entering the moisture discharging outlet. Installers may wish to develop their own solution, or rain covers and adaptor sets are available from Westside International. The rain cover is generally used where the membrane is installed directly onto the side wall of the cabinet or enclosure. When installing in an outdoor panel, avoid interference between the mounting screws and the rain cover.
Adapter set for indirect installation
The adapter set is designed for retrofit installations where making square holes in existing cabinets is difficult. The product is suitable for round moisture discharging holes and prevents raindrops or insects from entering the holes when a dehumidifier is used in an existing outdoor panel. A special vent cover is included.

Rain cover

Adaptor Set

Rosahl
micro-dehumidifier
micro-Entfeuchter
micro-déshumidificateur
micro-deshumidificador
Website Usage
Westside International Ltd
Registered in England
Registration No. 4018025
VAT No. 768327395
EIN 98-1234498